TL;DR
- Whole milk produces the smoothest microfoam; cold milk gives you more control time
- Purge steam wand first, angle at 20°, and keep pitcher tip just below surface
- Stop steaming at 60-65°C; overheat kills texture and sweetness
Milk Steaming Routine for Home Lattes: A Step-by-Step Guide to Silky Microfoam
There’s a reason your home latte never quite tastes like the one from your favorite café. The espresso is probably close. The beans might even be the same. But the milk? That’s where most home setups fall short.
Properly steamed milk isn’t just frothy—it’s silky, slightly sweet, and textured in a way that completely changes how a latte feels in your mouth. Master this one skill, and your morning cup will never be the same.
This guide walks you through exactly how to steam milk at home: the setup, the technique, the mistakes to watch for, and the habits that’ll get you to café-quality results faster than you’d expect.
Why Milk Steaming Matters More Than You Think
A latte is mostly milk. Roughly five to six ounces of it surrounds your double shot of espresso. So if that milk isn’t treated right, no amount of dialing in your grind or perfecting your extraction will save the drink.
Good steaming does three things:
- Adds texture: Microfoam—tiny, even bubbles—gives milk a creamy, velvety consistency that coats your mouth rather than sitting flat.
- Enhances sweetness: Heat activates the natural sugars in milk, making properly steamed milk noticeably sweeter without adding anything.
- Creates visual appeal: Smooth microfoam is also what makes latte art possible, even at the beginner level.
The difference between microfoam and stiff foam is enormous. One integrates into the espresso; the other floats on top and disappears in 30 seconds.
Choosing the Right Milk Before You Start
Your results are partly determined before you even touch the steam wand.
Whole milk is the gold standard for home steaming. Its fat content (3.5% or higher) and protein structure produce the smoothest, most stable microfoam. If you want the easiest path to great results, start here.
Plant-based milks behave differently, and it’s worth knowing what to expect:
- Oat milk: Steams closest to dairy; holds foam well and produces good texture. Barista-edition oat milks are specifically formulated to withstand heat and froth more easily. barista edition oat milk
- Soy milk: Also holds foam reasonably well, though it can split if overheated—keep the temperature conservative.
- Almond milk: Thinner consistency makes it trickier; it can foam but rarely achieves the same silky texture as whole milk or oat.
Cold milk gives you more control. Start with milk straight from the fridge at around 4°C. It gives you more time to work with before you hit the danger zone, whereas room-temperature milk reaches the cutoff point faster.
Setting Up Your Steam Wand: Don’t Skip These Pre-Steaming Steps
A bit of preparation makes every steam session cleaner and more consistent.
Purge the wand first. Open the steam valve for two to three seconds before you put the wand anywhere near your milk. This clears any residual water that condenses inside the wand between uses. Water in your milk dilutes it and disrupts foam formation.
Fill your pitcher to the right level. A standard 12 oz (350 ml) milk pitcher milk frothing pitcher 12oz works well for one to two lattes. Fill it to just below the spout—roughly one-third to one-half full. Too little milk and you’ll overheat it before you’ve built any foam. Too much and you’ll run out of room to work.
Wipe the wand tip after purging. Use a damp cloth to wipe down the exterior of the wand tip. Any dried milk from a previous session can splatter or affect the steam flow. Make this a reflex—purge, wipe, then steam.
The Steaming Technique, Step by Step
This is where most of the learning happens, and where a bit of patience goes a long way. There are two distinct phases to good milk steaming: the stretch and the spin.
Step 1: Position the Wand
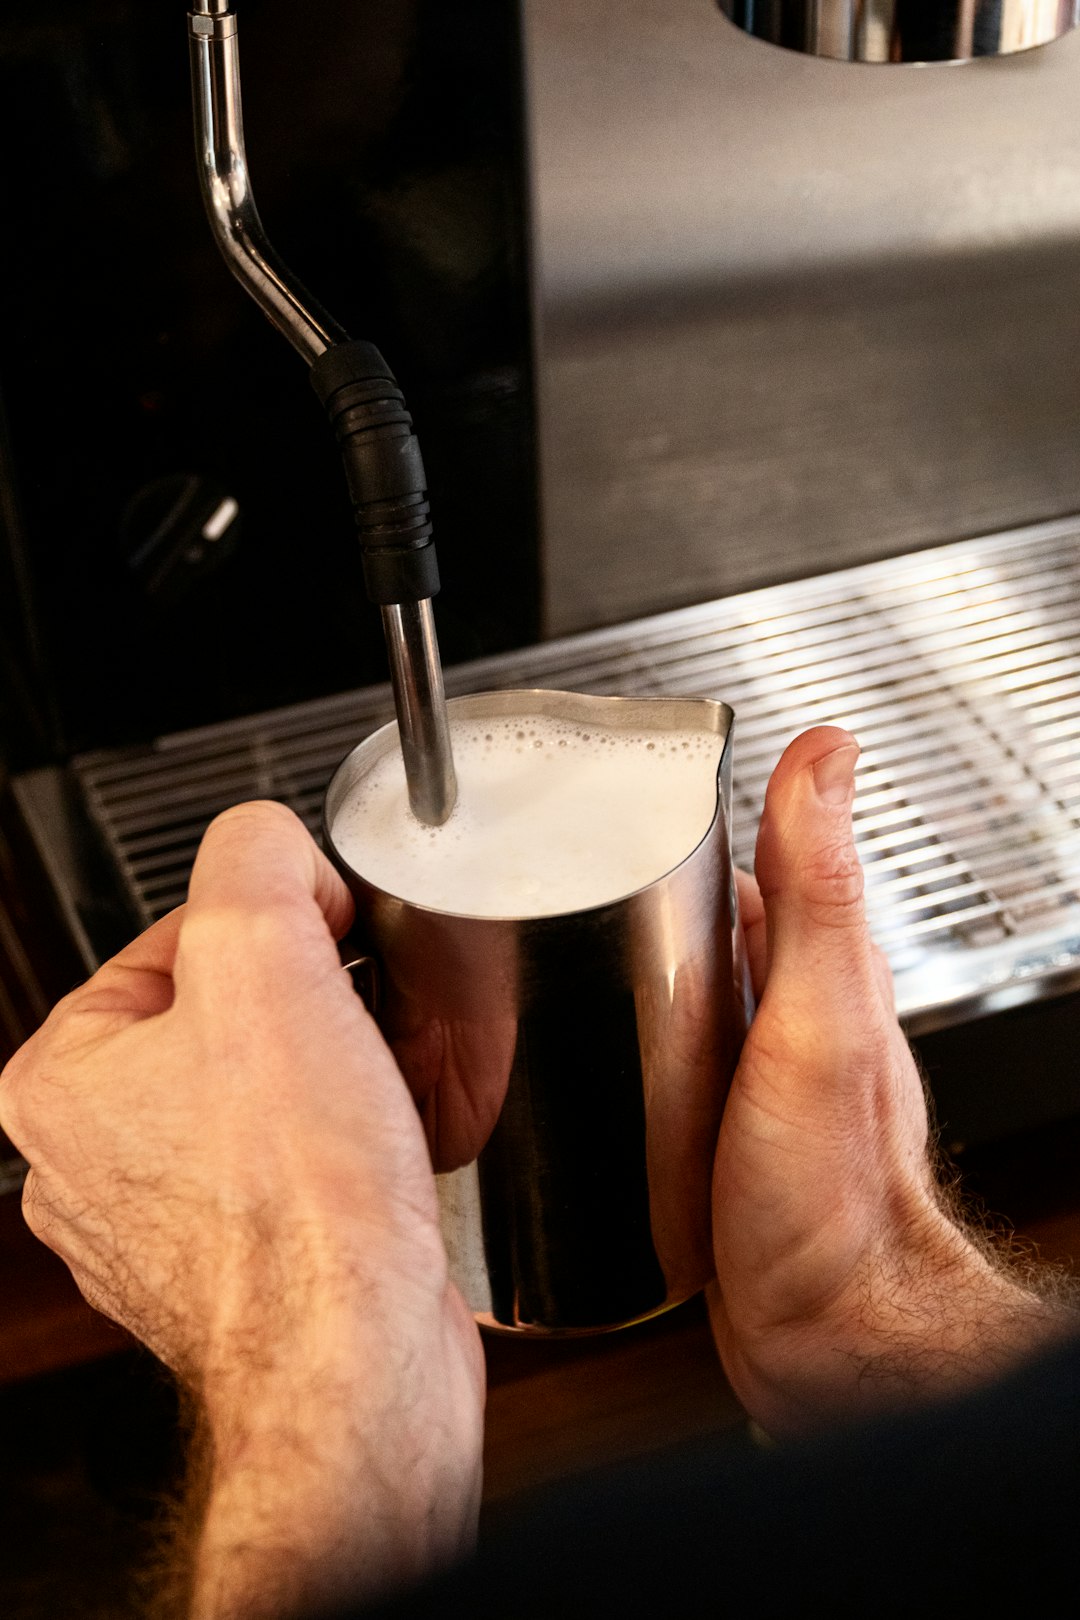
Hold your pitcher at a slight angle—not perfectly vertical—and submerge the steam wand tip just below the surface of the milk. You want the tip near the edge of the pitcher rather than dead center.
Open the steam valve fully. The goal here is to hear a quiet, gentle hissing sound. If it’s screeching loudly, the tip is too close to the surface. If you hear nothing useful, you may be too deep.
Step 2: The Stretch Phase (First 3–5 Seconds)
This phase introduces air into the milk and builds your microfoam base.
Lower the pitcher very slightly to bring the wand tip closer to the milk surface—you’re looking for a soft chirping or paper-tearing sound. Small amounts of air are folding into the milk. Hold this position for three to five seconds.
You’ll see the milk volume start to rise in the pitcher. That’s the foam building.
Step 3: The Spin Phase (Next 10–15 Seconds)
Once you’ve introduced enough air, submerge the wand tip a little deeper and shift focus to creating a strong whirlpool. The milk should be visibly spinning in a circular motion—this incorporates the foam evenly and breaks down any large bubbles into the silky microfoam texture you’re after.
Keep the pitcher angled so the rotation stays consistent. Your wand should be slightly off-center to drive the spin.
Step 4: Stop at the Right Temperature
Remove the wand when the milk reaches 65–70°C (149–158°F). If you’re using a thermometer milk thermometer for coffee, pull out at 65°C—the residual heat will carry it slightly higher on its own.
A practical shortcut: when the bottom of the pitcher becomes uncomfortable to hold with your bare palm, you’re close. That usually corresponds to around 60–65°C. A few more seconds and you’re done.
Over-steaming is one of the most common mistakes at home. Milk above 70°C starts to scald—the proteins break down, the natural sweetness is lost, and your foam turns stiff and separated rather than velvety.
Common Steaming Mistakes and How to Fix Them
Even experienced home baristas run into these. Here’s what’s going wrong and how to correct it quickly.
You’re hearing a loud screech.
The wand tip is too close to the surface and pulling in too much air at once. Lower the pitcher to submerge the tip a little deeper. The sound should soften to a quiet hiss.
Your foam is thin and disappears within seconds.
You’re not stretching long enough. Extend the air-introduction phase to five to eight seconds before moving into the spin. More time stretching means more microfoam volume.
The milk smells burnt or bitter.
You’ve overheated it. This usually happens when you get distracted or don’t have a thermometer handy yet. The fix is simple: pull the wand out earlier. Start aiming for 60°C until you build a feel for the temperature.
You’re getting big bubbles mixed with thin liquid.
Your whirlpool isn’t strong enough to break those bubbles down. Angle the pitcher more dramatically and position the wand tip further off-center. A stronger spin integrates the foam more evenly.
Cleaning Your Steam Wand (This Step Is Non-Negotiable)
Milk and heat are a bad combination when left to sit. Dried milk blocks the wand’s steam holes, reduces pressure, and becomes a breeding ground for bacteria. Cleaning takes 30 seconds—do it every single time.
Immediately after steaming:
1. Purge the steam valve for two seconds to push out any milk that entered the wand tip.
2. Wipe the exterior tip with a damp cloth right away, while it’s still hot and before the milk sets.
Weekly deep-clean:
If your machine has a removable wand tip, unscrew it and soak it in hot water with a small amount of espresso machine cleaner for 15 minutes. Rinse thoroughly and flush with steam before using again.
Neglecting this is one of the fastest ways to damage your steam wand and degrade the quality of your foam over time.
Pro Tips for Getting Consistent Results
A few habits separate home brewers who improve quickly from those who plateau early.
Be deliberate about your setup. Use the same pitcher angle, the same wand depth, and the same cold milk temperature every time. Consistency builds muscle memory. Experimenting with multiple variables at once makes it hard to learn from what went wrong.
Use a thermometer for your first 10–15 attempts. It removes the guesswork and teaches you what the correct heat feels like in your hand. Once that temperature sense is calibrated, you can put the thermometer away and rely on touch.
Let the milk rest for three to five seconds before pouring. After you remove the wand, give the milk a moment. Large bubbles rise and pop on their own, leaving you with a smoother, more uniform texture at the surface. A gentle swirl of the pitcher helps too.
Don’t dump steamed milk that isn’t perfect. Even slightly uneven foam can be fixed with a gentle tap of the pitcher on the counter and a circular swirl. You’re breaking down the large bubbles and redistributing the texture.
From Your First Attempt to Café-Quality Lattes
Milk steaming has a real learning curve. Your first few attempts might produce foam that’s too stiff, too thin, or unevenly textured. That’s completely normal—it happens to everyone.
What makes the difference is repetition with intention. Pay attention to the sound. Notice the temperature. Watch how the milk moves in the pitcher. Within a few dozen attempts, your hands will know what to do before your brain catches up.
Start with whole milk, focus on that quiet hiss during the stretch phase, and pull the wand out before the milk gets too hot to handle. Those three things alone will put you ahead of most home setups.
Once you’ve dialed in the technique, you’ll find yourself making lattes that are genuinely hard to tell apart from your café order—and that’s a satisfying place to be at 7 a.m. with your own kitchen espresso machine humming beside you.
Photo by Simon Takatomi on Unsplash